


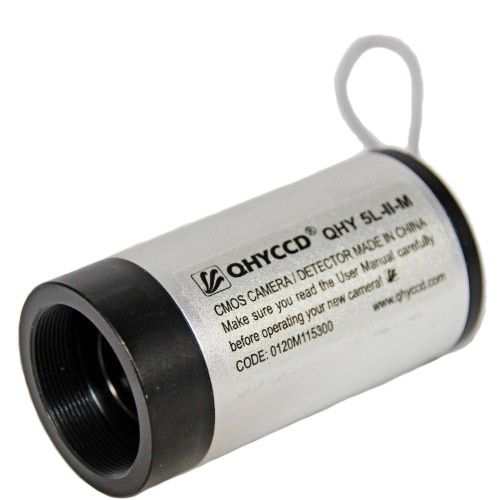
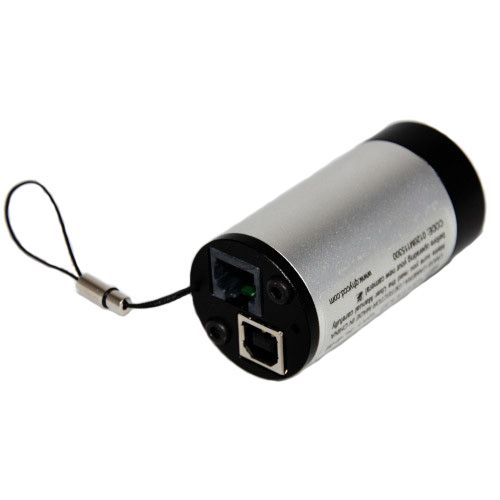


The QHY5L-II Series uncooled cameras fit in a standard 1.25-inch eyepiece holder and have an adjustable location ring for confocality with an eyepiece. They are ideal for use as low-weight autoguiders or planetary cameras where short exposures are typical. The cameras come in very small but powerful packages! The improved thermal design allows the heat generated by the CMOS sensor to be transferred externally to the telescope’s eyepiece tube.
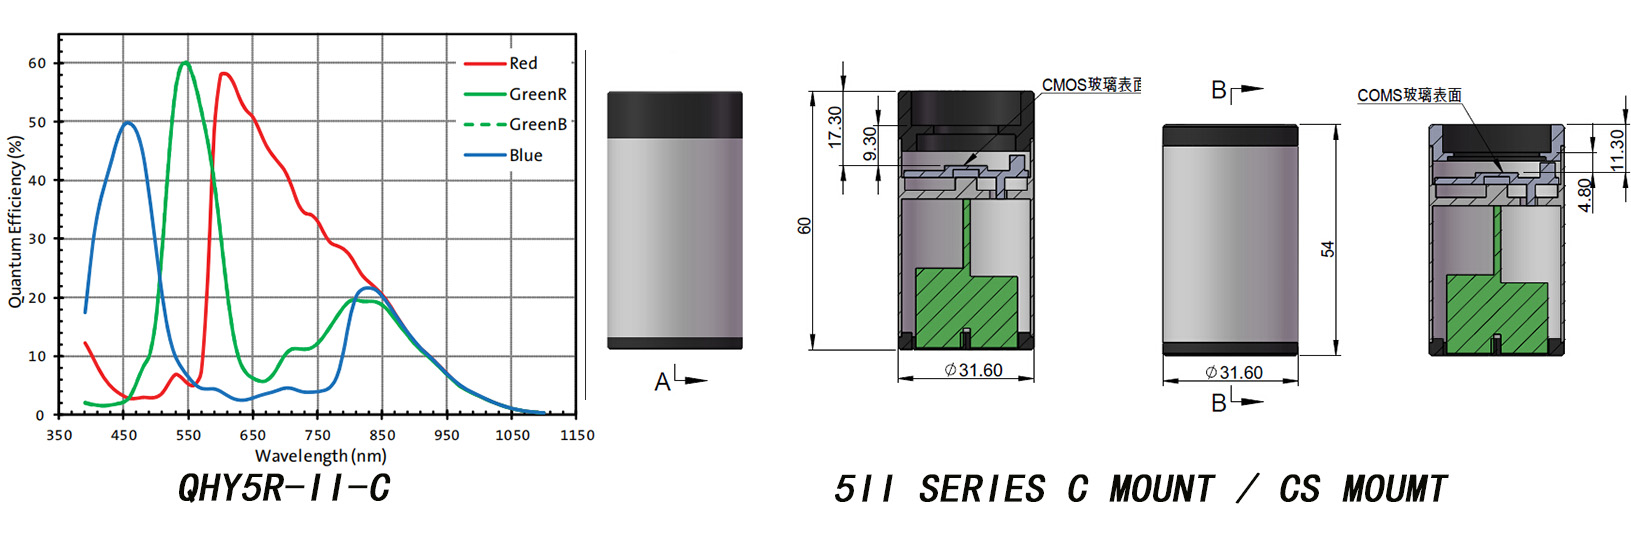
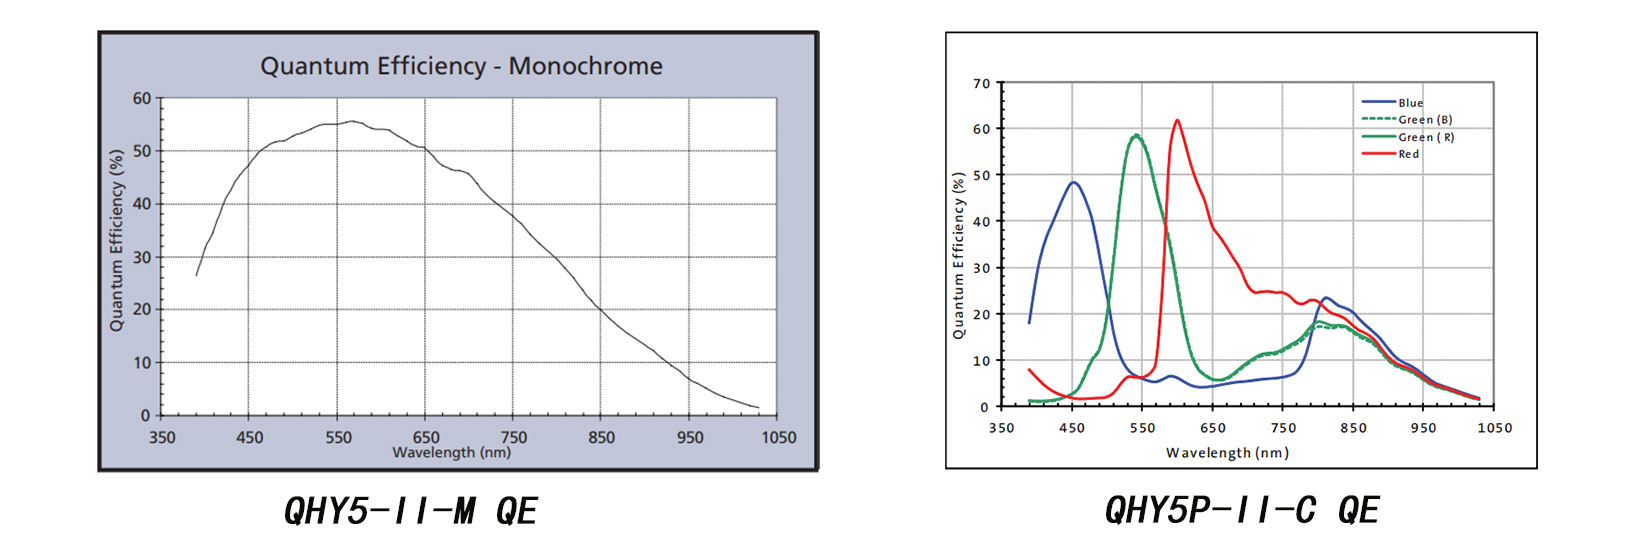
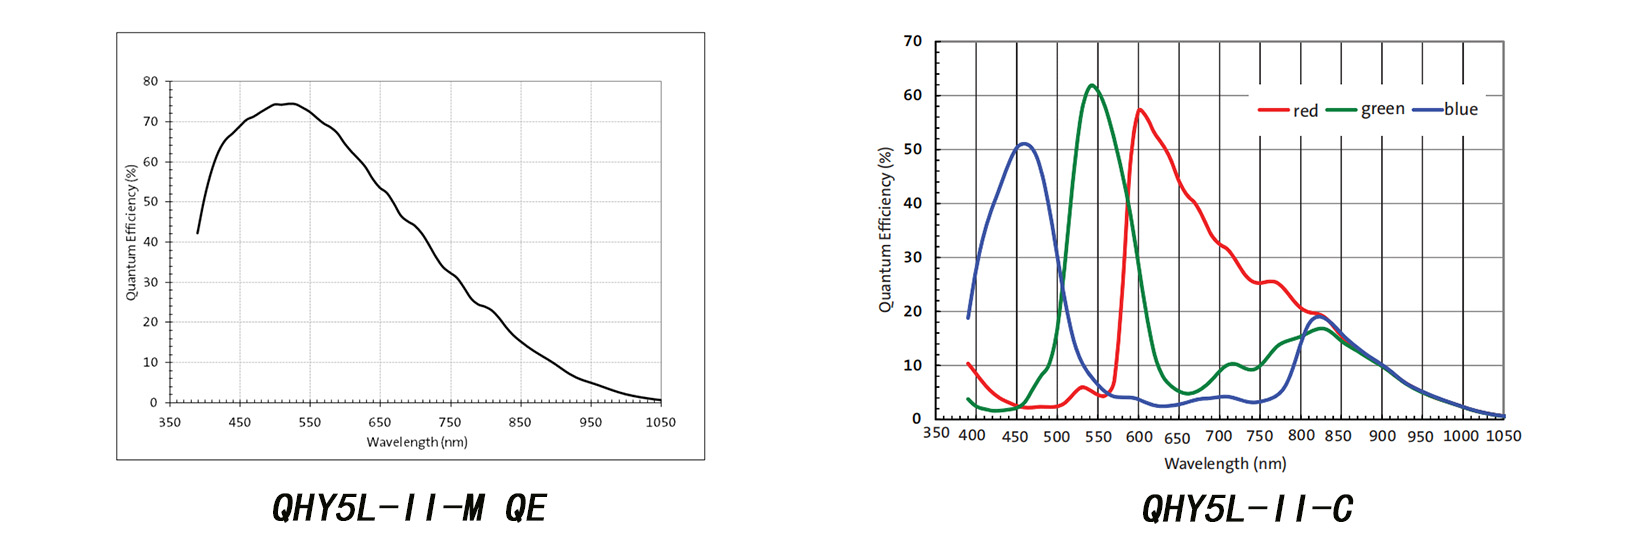
QHY5L-II is one of our most popular guide cameras, it has high sensitivity, an exceptional 74% QE, and low noise. The read noise is remarkably low (~ 4 electrons) and the on-chip FPN (Fixed Pattern Noise) calibration function solves one of the major problems of CMOS technology, resulting in images that are clear and uniform, even under high gain. With these advantages, the QHY5L-II provides outstanding image quality for planetary imaging, autoguiding, deep-sky and all-sky imaging. Available in color and monochrome versions. The sensor has 1280 x 960 pixels at 3.75um and the camera is capable of 30 FPS in high resolution mode, 106 FPS in VGA mode.
Curves

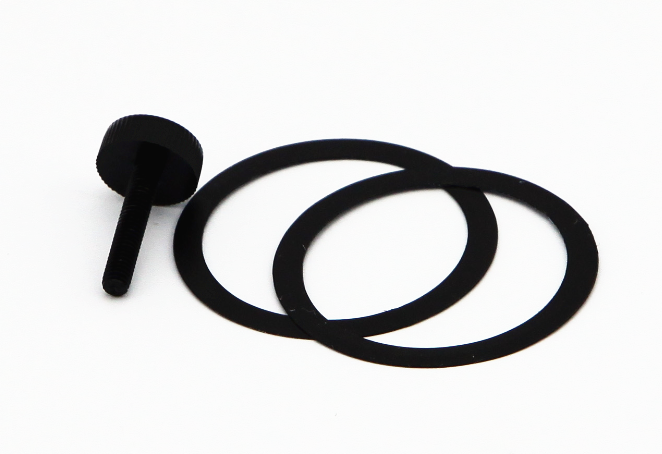
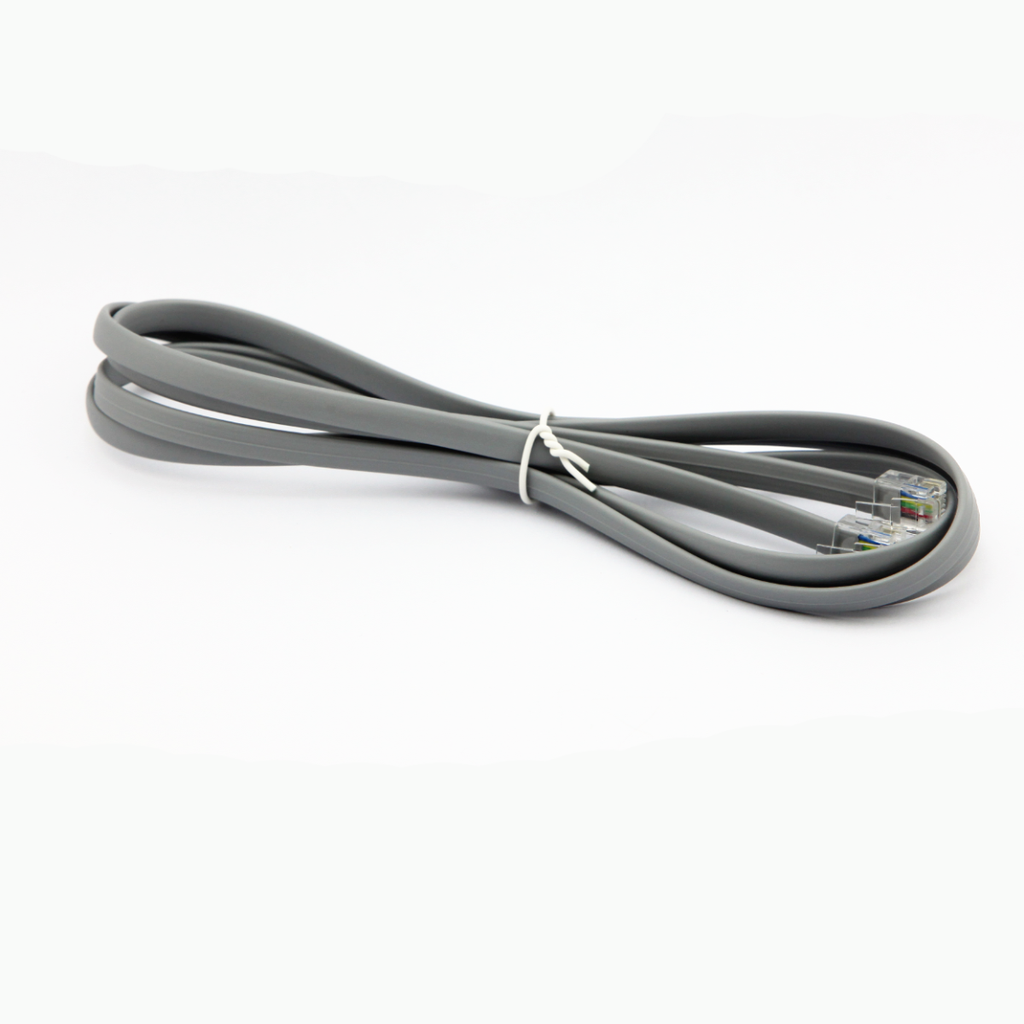
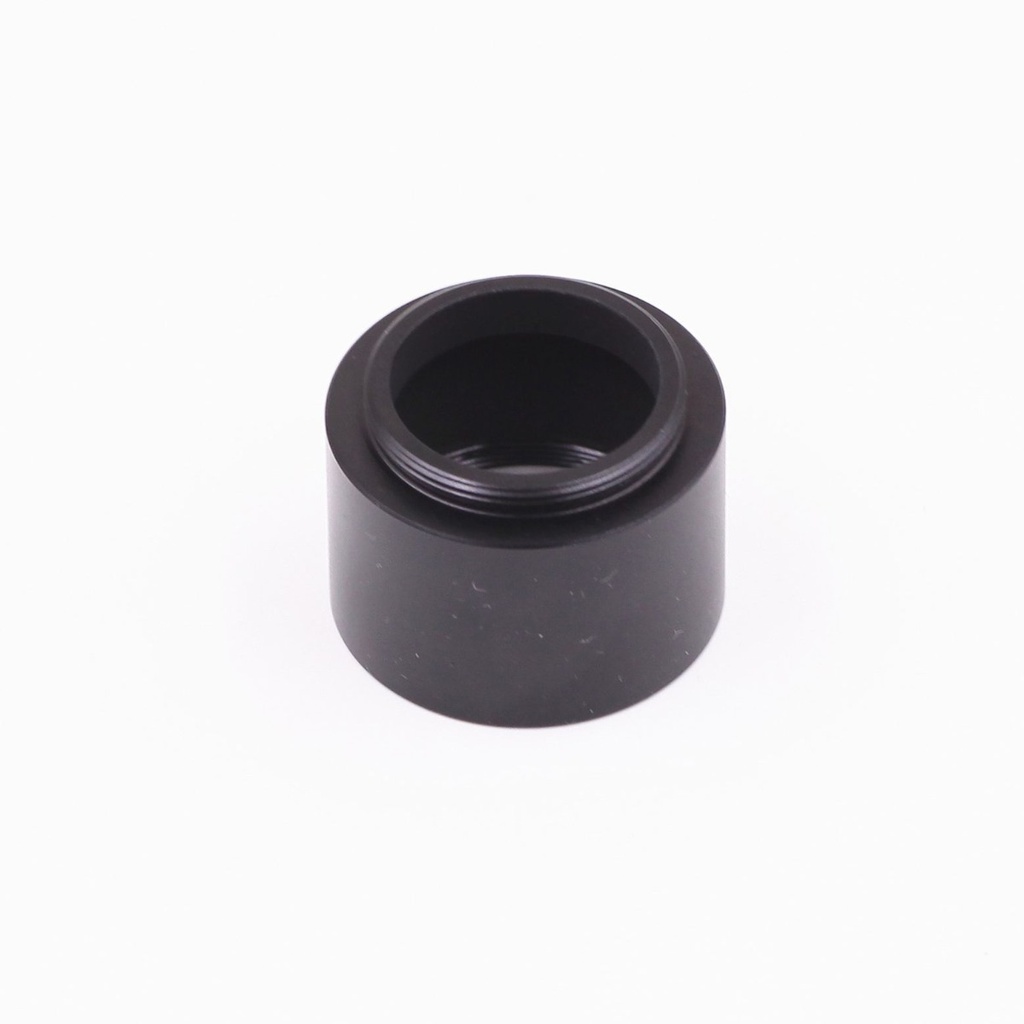
Included Items
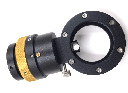
QHY 5L-IIM planetary and guide camera.
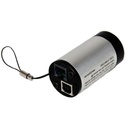
1.25-inch camera extender.
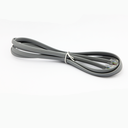
USB cable.
ST4 guide cable.
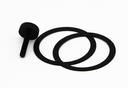
CS lens spacers.
Parfocal ring.
Storage box.
1. Before Start: Input Voltage Requirements
The camera requires an input voltage between 11V and 13.8V. If the input voltage is too low the camera will stop functioning or it may reboot when the TEC power percent is high, causing a drain on the power. Therefore, please make sure the input voltage arrived to the camera is adequate. 12V is the best but please note that a 12V cable that is very long or a cable with small conductor wire may exhibit enough resistance to cause a voltage drop between the power supply and the camera. The formular is: V(drop) = I * R (cable). It is advised that a very long 12V power cable not be used. It is better to place the 12V AC adapter closer to the camera.
First connect the 12V power supply, then connect the camera to your computer via the USB3.0 cable. Make sure the camera is plugged in before connecting the camera to the computer, otherwise the camera will not be recognized. When you connect the camera for the first time, the system discovers the new device and looks for drivers for it. You can skip the online search step by clicking “Skip obtaining the driver software from Windows Update” and the computer will automatically find the driver locally and install it. If we take the 5IIISeries driver as an example (shown below), after the driver software is successfully installed, you will see QHY5IIISeries_IO in the device manager.
Please note that the input voltage cannot be lower than 11.5v, otherwise the device will be unable to work normally.
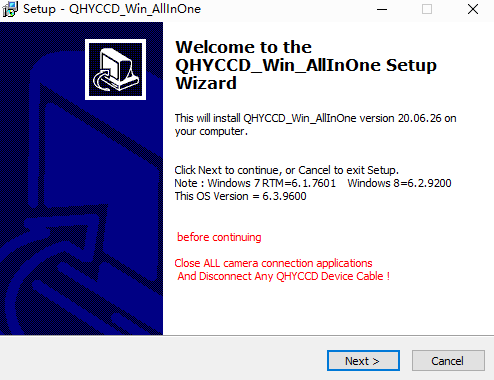
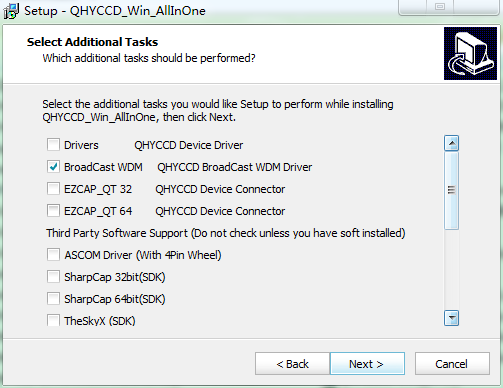
2. Install "All-In-One" System Pack
All-in-one Pack (Windows) is for all QHYCCD USB3.0 devices, including all Cooling CMOS cameras, QHY5III and QHY 5II series, QHYCFW3. We recommend you choose “Stable Version” as usual.
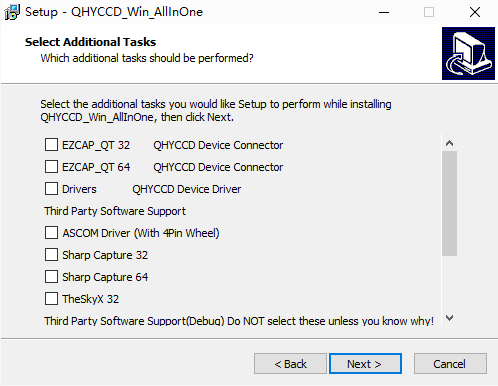
In this pack there are:
1. System driver. It must be installed to make devices work.
2. EZCAP_QT: it’s developed by QHYCCD which could be used in QHY devices tests, simple capture tasks, and above all, the management of updates. So even if you won’t use EZCAP_QT as your main capture software, we suggest you install it to get the latest information of QHY drivers/SDK updates.
3. Ascom driver: Ascom Platform is supported by most astronomy devices which connect to Windows.
4. SDK: SDK is the file of “.dll” format. With this the device can be identified in other capture software.
5. SkyX Plugin: special support for SkyX.
6. QHYCCD BroadCast WDM Driver: It is a broadcast driver that supports QHYCCD cameras with video broadcast function, which can meet the needs of customers to send video images to other target software.
How to install it?
Take SharpCap (x64) for example:
Before the installation, make sure you’ve already installed SharpCap (X64) on your PC;
Then click ”Third Party Software Support” – “SharpCap 64”, the pack will detect the location of SharpCap files and install automatically; if not, please manually select root directory of SharpCap where you installed it, like: C:\Program Files\SharpCap 3.2 (64 bit)

3. Connect with Software
Before using software, make sure you have connected the cooling camera to the 12V power supply and connected it to the computer with a USB3.0 data cable. If it’s a planetary/guiding camera, 12V power is not needed.
Note: We recommend 64-bit Software when you’re using cameras with a large sensor, such as QHY600. A full resolution image from the QHY600 is 120MBytes. It takes a significant amount of processing power and memory to capture, buffer, display and process. We therefore suggest using 64-bit software with the QHY600, for example, SharpCAP x64 , N.I.N.A x64. etc. Although the camera has 4GB of internal memory, 32-bit software will run within this memory area and the remaining memory may be not sufficient for normal operation.
EZCAP_QT is software developed by QHYCCD. This software has basic capture functions for QHYCCD deep sky cameras.
Run EZCAP_QT. Click “Connect” in Menu -> Camera. If the camera is successfully connected, the title line of EZCAP_QT will display the camera firmware version and the camera ID as shown below.
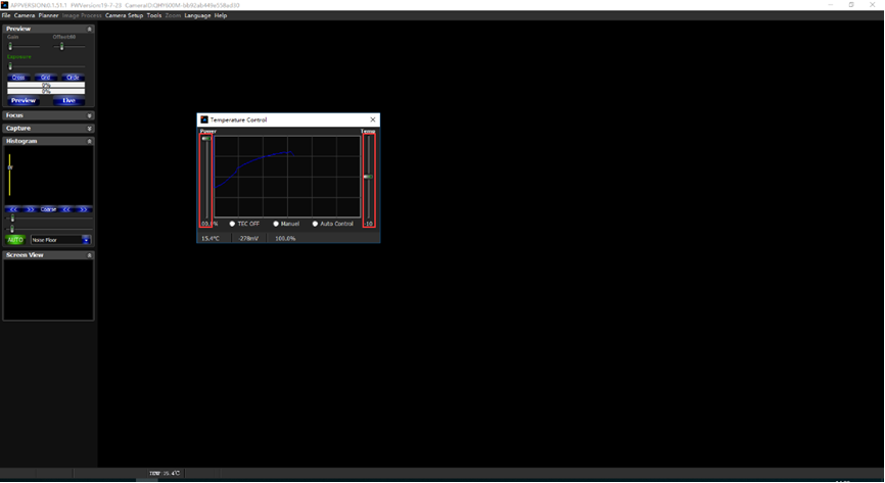
Click “Temperature Control” in “Camera Settings” to set the temperature of the CMOS sensor. You can turn on “Auto” to set the target temperature. For example, here we set the target temperature to -10C. The temperature of the CMOS sensor will drop quickly to this temperature (approximately 2-3 minutes). If you want to turn off cooling, you can choose Stop. If you just want to set the TEC power but not the temperature. You can select “Manual” and then set the percentage of the TEC power.
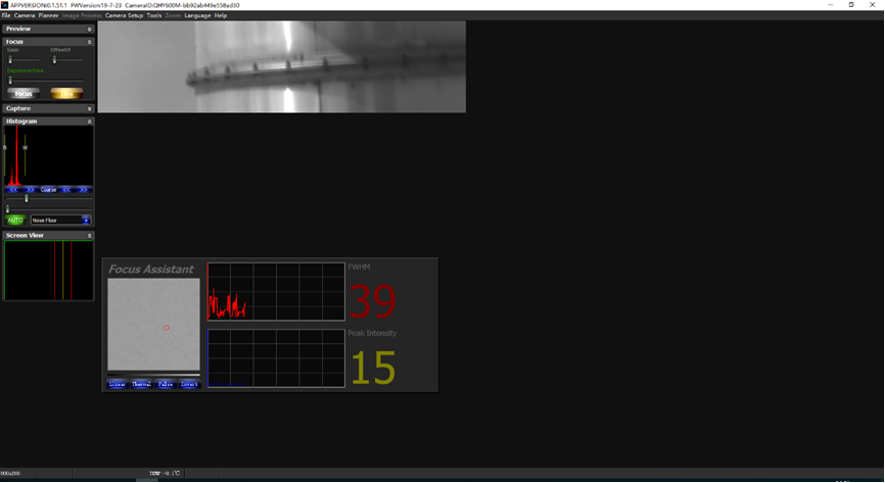
You can use the “preview tab” to preview and use the focus tool to focus. Then use the “capture tab” to capture the image.
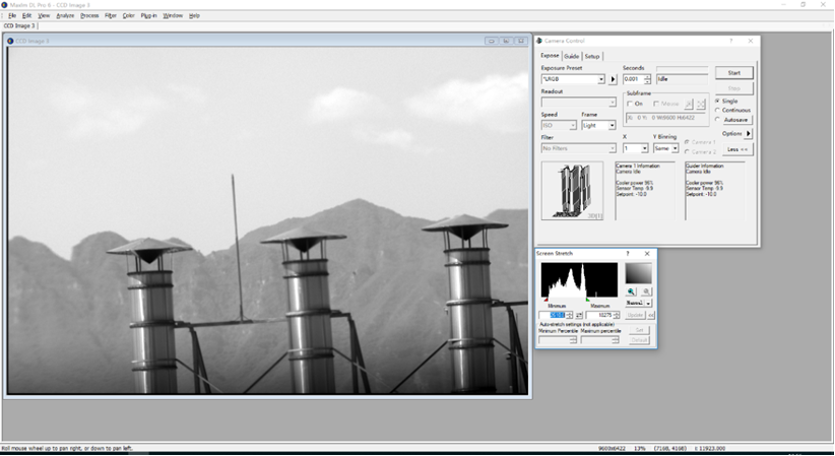
Launch SharpCap. If the software and drivers mentioned above are installed successfully, the video image will appear automatically about 3 seconds after the software loads. You will also see the frame rate in the lower left corner of the software window as shown below.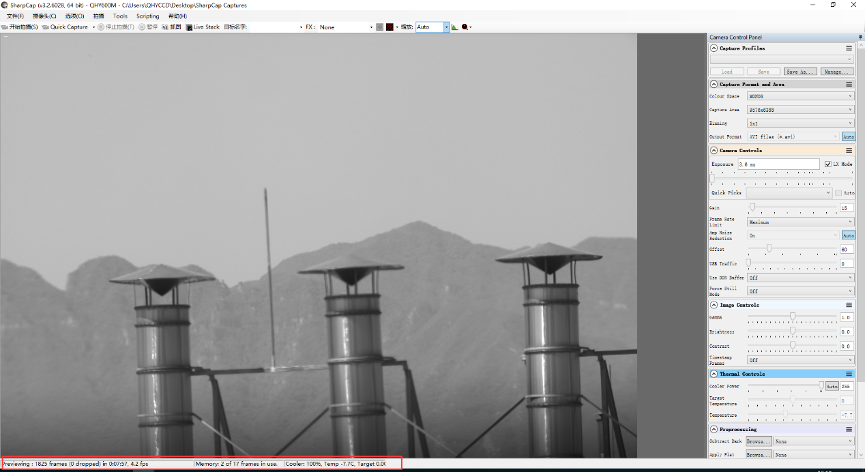
If you have already started the SharpCap software before connecting the camera, in order to open the camera, click on the “camera” in the menu bar and then select the device.
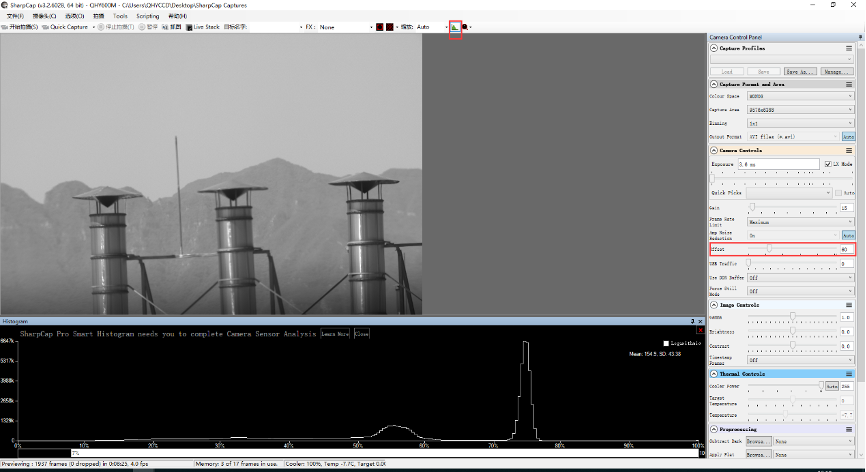
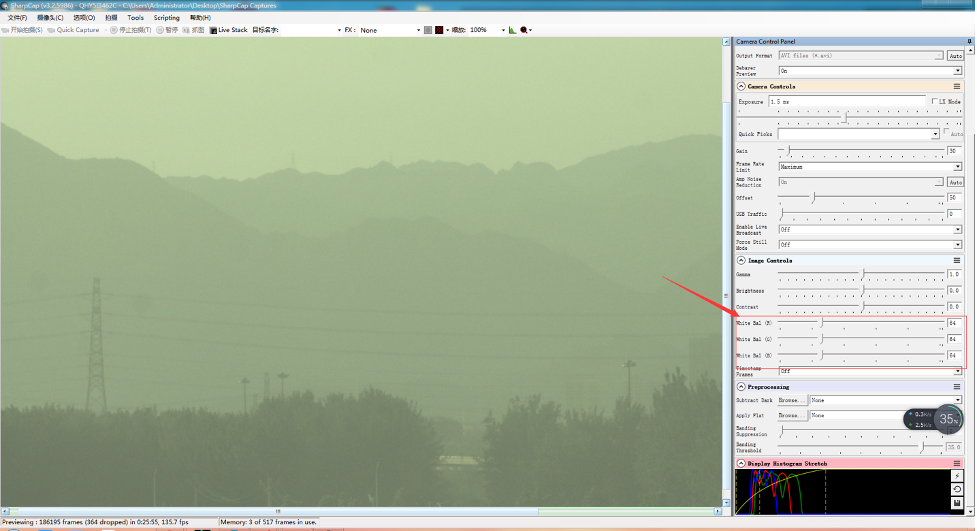
Offset adjustment. When you completely block the camera (i.e., like taking a dark frame) you may find that the image is not really zero. Sometimes this will reduce the quality of the image contrast. You can get a better dark field by adjusting the offset. You can confirm this by opening the histogram as indicated in the figure below.
If you want to enter the 16-bit image mode, select the “RAW16” mode.
By selecting the “LX” mode you can expand the exposure setting range and take long exposures.
After cooling devices connected to the 12V power supply, the temperature control circuit will be activated. You can control the CMOS temperature by adjusting the settings in the figure below. Basically, you can control the temperature of CMOS by either adjusting “Cooler Power” or clicking “Auto” and setting “Target Temperature”. You can also see the CMOS temperature at the lower-left corner of the software window.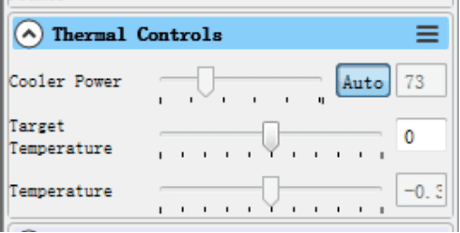
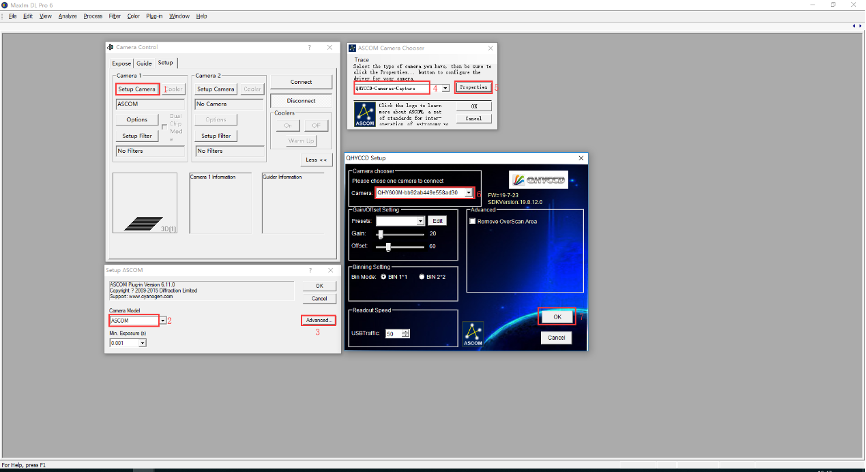
With ASCOM drivers, you can use the device with many software packages that support the ASCOM standard. We will use Maxim DL below as an example, but a similar procedure is used for The SkyX and other software packages supporting ASCOM.
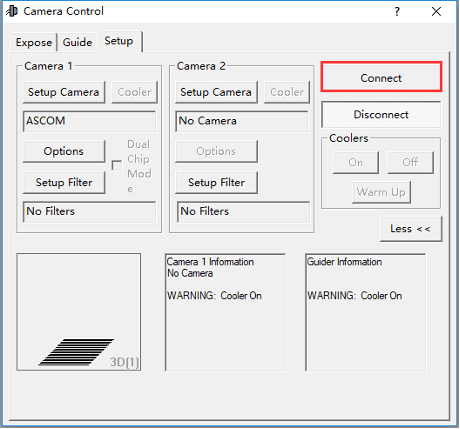
First make sure you have not only loaded the ASCOM drivers but that you have also downloaded and installed the ASCOM platform from ASCOM. After both the drivers and platform are installed, start MAXIMDL. Follow the instructions shown below to finish the setup. Then Click Connect in and enter the software.

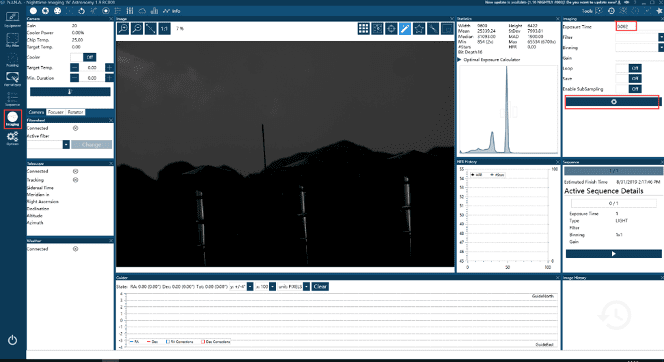
Open N.I.N.A. – Nighttime Imaging ‘N’ Astronomy. Drive connections via ASCOM.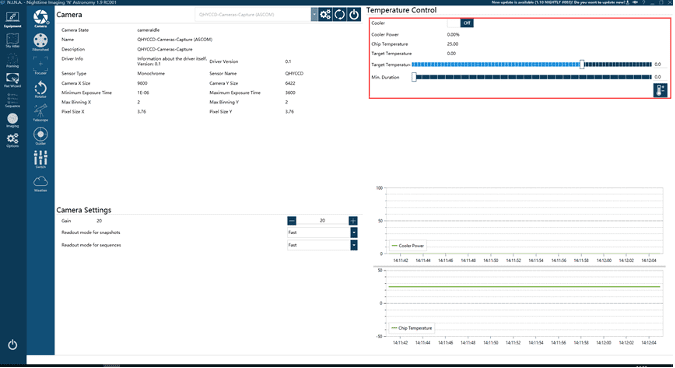
Turn on the TE cooler to set temperature. Then set the exposure time to capture the image.
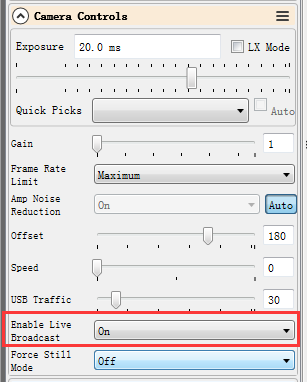
4. BroadCast WDM Camera Driver
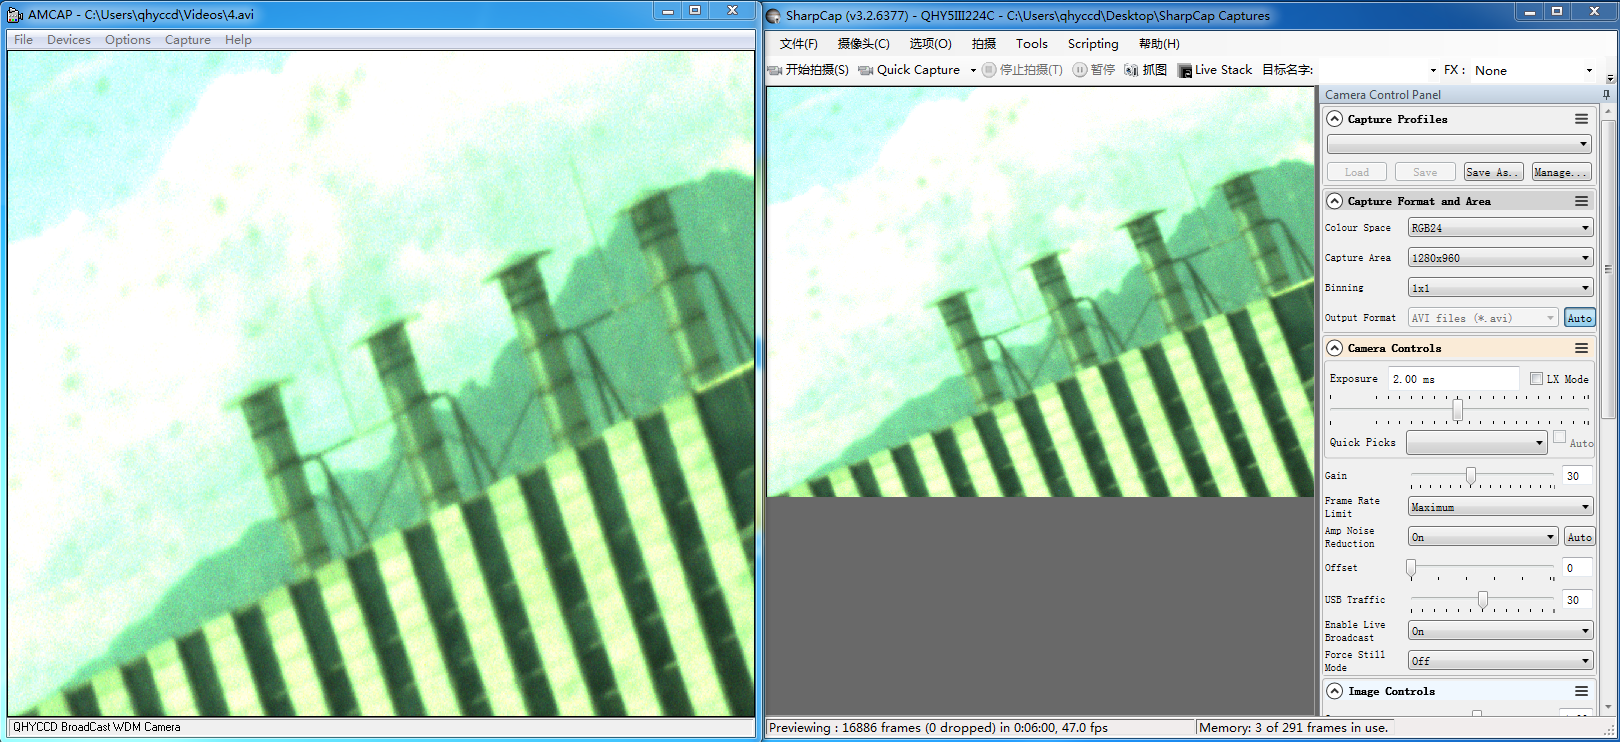
QHYCCD BroadCast WDM Camera is a broadcast driver that supports QHYCCD cameras with video broadcast function, which can meet the needs of customers to send video images to other target software. For example, use sharpcap to connect a WDM-enabled camera, and the sharpcap display video image can be sent to other WDM-supported software for display, which is suitable for video online broadcast applications.
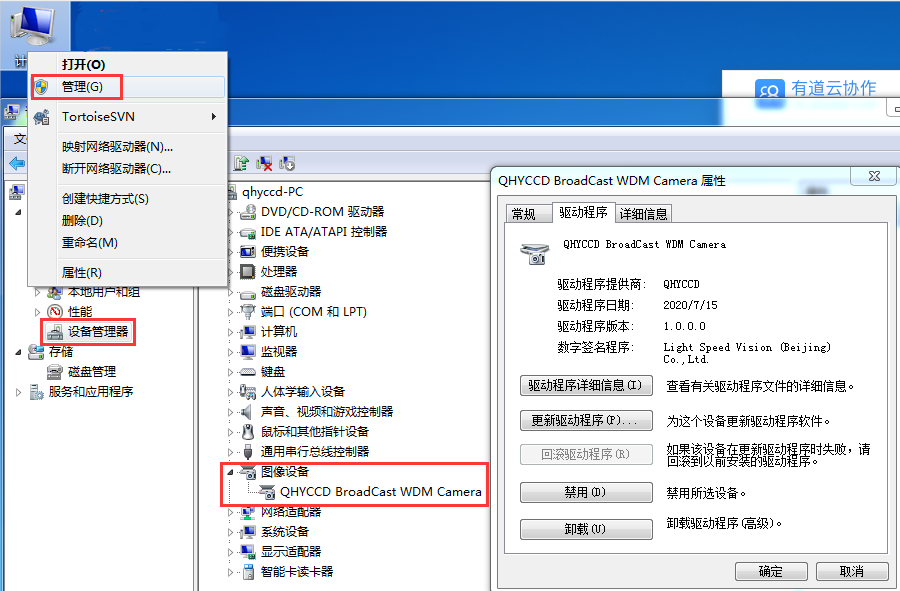
The installation process is over, right-click the computer to find the device manager, and check that the image device name is QHYCCD BroadCast WDM Camera, which means the installation is successful.
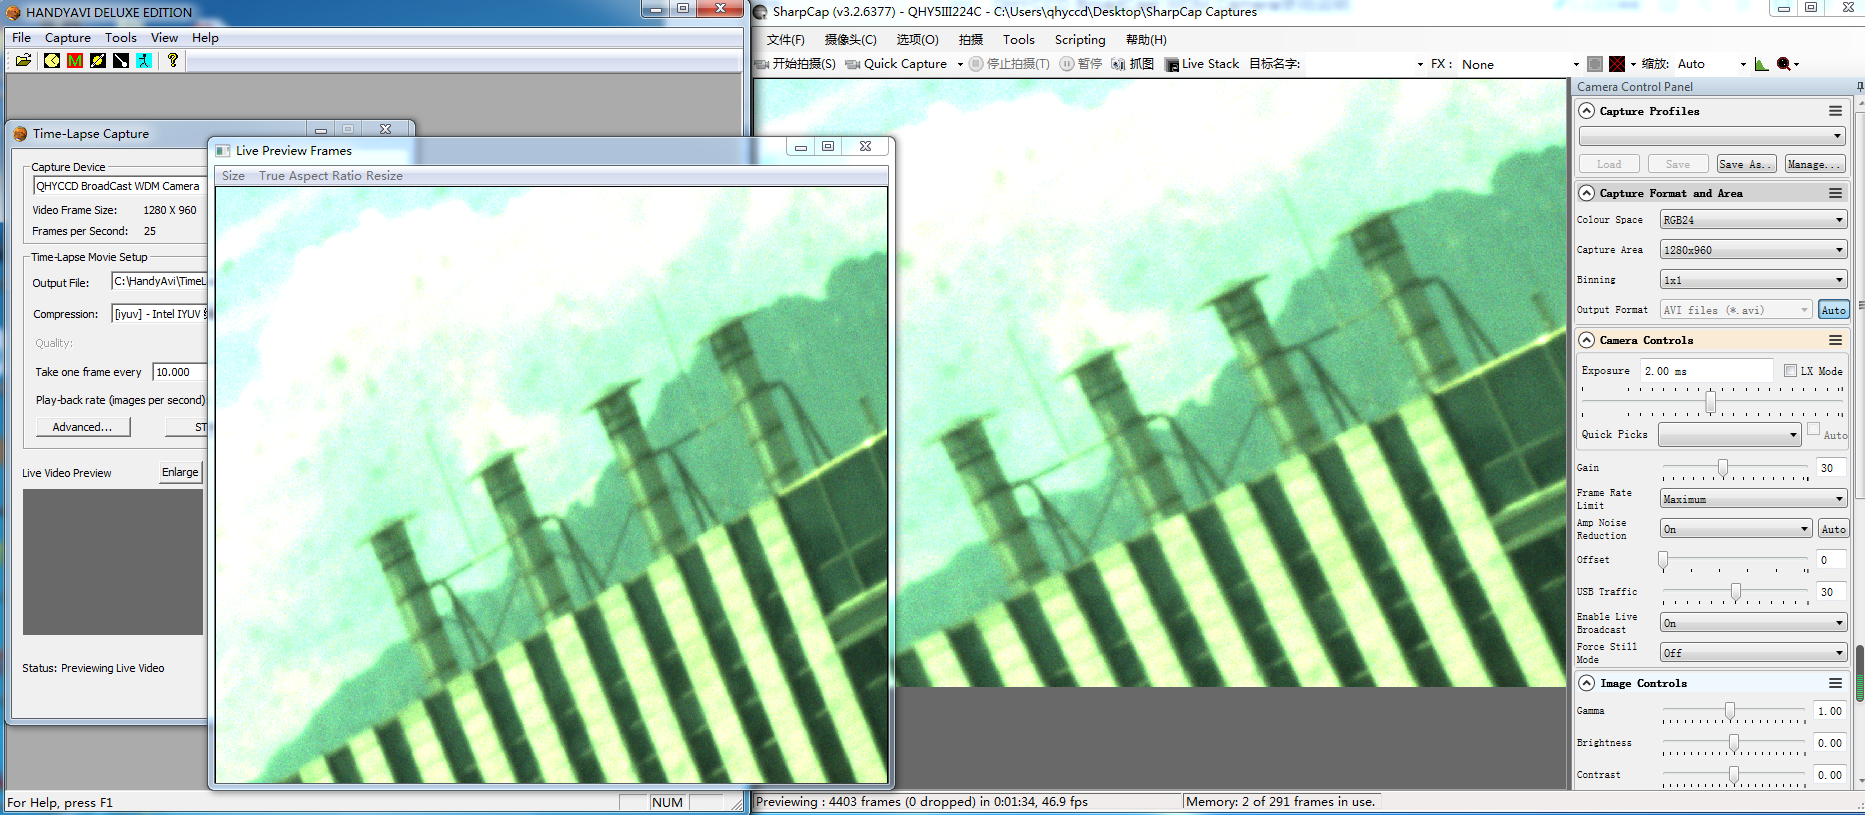
 HANDYAVI test effect chart:
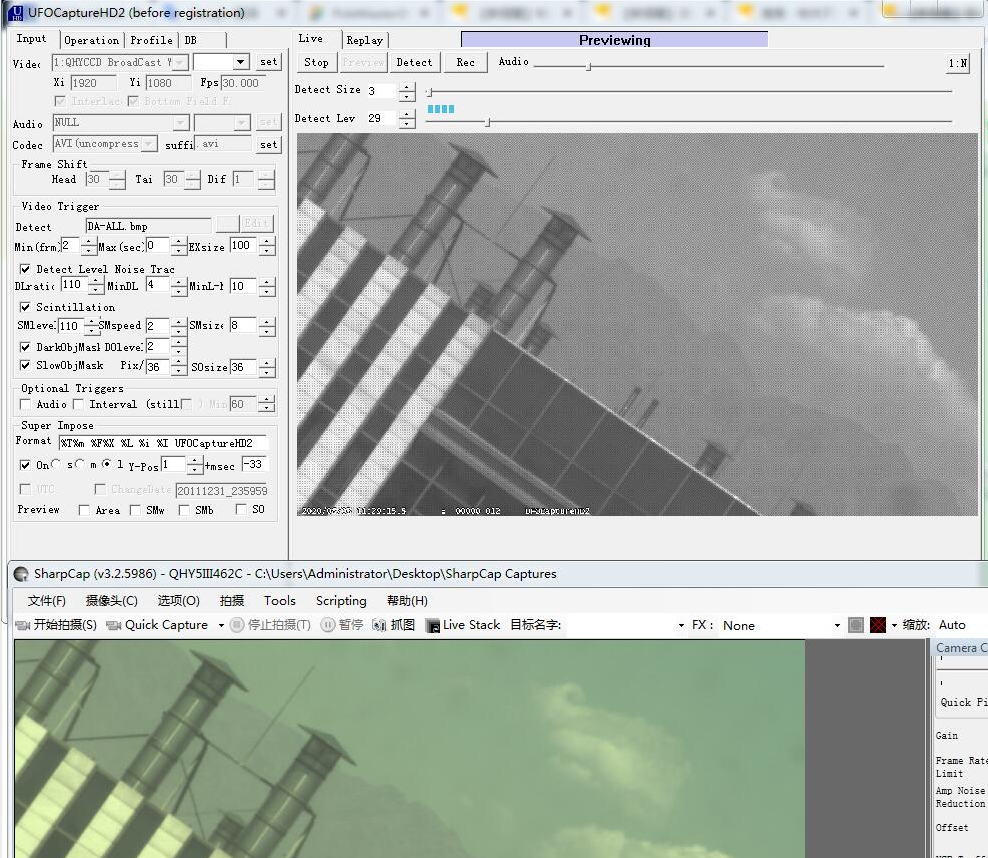
UFOCAPTURE test renderings:
| Cooled CMOS Camera | Bayer |
| QHY600C | RGGB |
| QHY268C | RGGB |
| QHY410C | RGGB |
| QHY367Pro | RGGB |
| QHY128Pro | RGGB |
| QHY294C | RGGB |
| QHY247C | RGGB |
| QHY168C | RGGB |
| QHY165C | RGGB |
| QHY163C | GRBG |
| QHY183C | RGGB |
| QHY174C | RGGB |
| QHY178C | GBRG |
| QHY290C | GBRG |
| QHY224C | GBRG |
| Planetary and Guiding | Bayer |
| QHY5III174C | RGGB |
| QHY5III178C | GBRG |
| QHY5III224C | GBRG |
| QHY5III290C | GBRG |
| QHY5III462C | GBRG |
| QHY5III485C | RGGB |
| QHY5L-II-C | BGGR |
| QHY5P-II-C | GBRG |
| Cooled CCD Camera | Bayer |
| QHY8L-C | GBRG |
| QHY10-C | RGGB |
| QHY12-C | BGGR |
Now the ratio R”:G”=(R+bias)/(2R+bias) and it is not equ to 1:2. It shows the bias will effect the true value of the R:G. And the ratio of R:G will arious when the image light changed. It is hardly to correct with a fixed ratio.
But for DSO capture, You should keep the offset above zero and avoid the background is cut off. A background from 1000-5000 is a good value(16bit mode) for DSO imaging.
| Brand | QHYCCD |